Step-by-step instructions on replacing faucet ceramic cartridge

Summary of method to replace tap cartridge
Here is a summary of how I go about replacing the cartridge and servicing a single level mixer tap or faucet to fix a leak or to stop dripping. If the faucet starts to leak, either through one of its joints or continues to drip out of the spout after it has been turned off then most likely the cartridge inside the tap needs replacing. The cartridge resides inside the tap housing just under the tap’s handle. In fact the handle of the tap is attached to the cartridge’s control lever. In chronological sequence these are the steps I suggest when changing the cartridge on a single level mixer faucet or tap..
- Buy the correct replacement cartridge – it is best to make sure when buying a new tap or faucet that it takes conventional, off the shelf generic cartridges usually 25mm, 35 mm or 40mm diameter. Some upmarket types have specialised cartridges which are not always easily available. Some cases it may require replacing the whole tap, not too serious for a sink or a basin but disastrous for a faucet like shower or bath that is built into the wall.
- Turn off water supply hot and cold and open the faucet to release pressure in pipes and check that it is off.
- Take photos of tap before dismantling to avoid confusion when reassembling. Note hot is usually to the left but occasionally I have come across the opposite orientation, the photo will help sort this out.
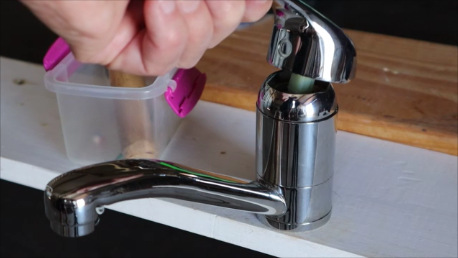
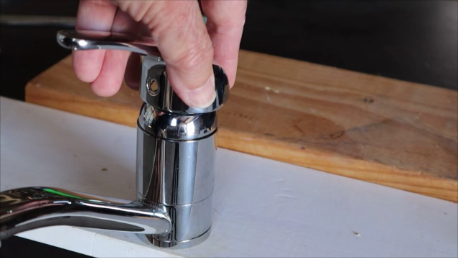
- Remove the grub screw cover.

- 4. Locate and remove cover to grub screw securing the handle and loosen grub screw usually, an Allan key of 2.5 mm will fit. Remove handle carefully
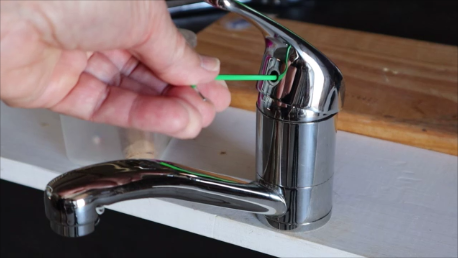
Remove finishing ring, if tight use a strap wrench to avoid scratching the chromium plating.

Remove brass cartridge retaining ring with a wrench, it may be necessary to hold faucet housing with strap wrench to avoid it turning with the brass screw.

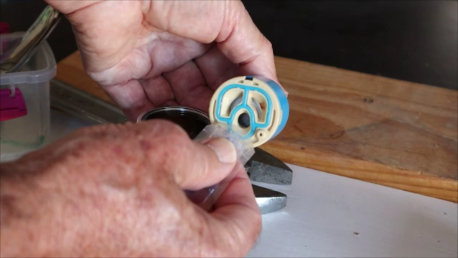
Remove cartridge noting its orientation. This is a good time to talk about cause of leak. If it leaks through one of the tap joints then it could be leaking past the silicone-rubber gasket under the cartridge in which case a tweak on the brass nut holding the cartridge may help, if that doesn’t work then replace the cartridge. Leaking out of the spout is usually something failing inside the cartridge in which case again replace it. Now the only time you may consider opening the cartridge, to say hone the ceramic discs, is if you cannot obtain the specific cartridge for the faucet because opening and repairing the cartridge is highly unpredictable and should be avoided if at all possible. Which brings me back to my original point, when you buy a tap make sure it takes standard, off-the-shelf generic cartridges.

Check seat of the cartridge inside tap is clean, if it needs to be cleaned avoid scratching the brass seat, clean with a cloth only.

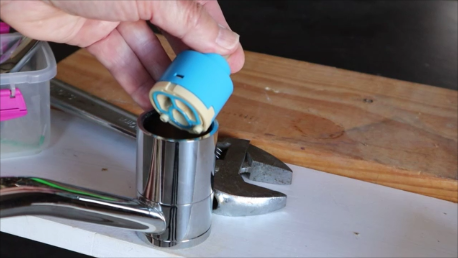
Apply a thin layer ‘O’ Ring grease to new cartridge’s silicone-rubber gasket
Insert new cartridge twisting left and right until it drops into place ensuring the 2 plastic locating lugs underneath the cartridge are in the lug holes in the base of the tap housing. The cartridge will now be ‘locked’ in the correct orientation and you should be unable to rotate it left or right.
Replace brass retaining ring and tighten moderately to compress the silicone gasket against the faucet housing base ensuring a good seal.


Replace handle but don’t tighten grub screw until you have, turned on the water and checked that faucet is operating correctly and that there are no leaks
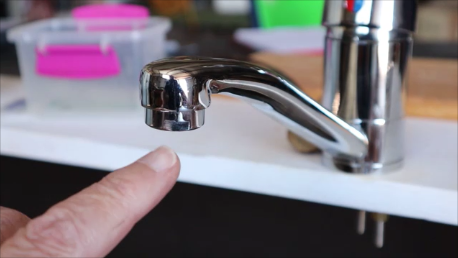
Always also check and clean the filter-aerator on the end of the spout because if partially blocked it causes back pressure which may cause the cartridge to fail and be the original cause of the leak.

Job done
Kitchen faucets have a horizontally mounted cartridge while basins are vertical but process is essentially the same.
The video demonstration can be accessed here:
Here are some more related DIY projects:
Repair dripping bath tap or faucet:
How to repair a leaking toilet cistern:
Repair a dripping garden tap
Find tank water level with a stud finder:
Comments are most welcome, try this and send us some feedback☺️ Why not visit our channel and browse through our other videos? http://www.youtube.com/c/AnnErasmus
Short Disclaimer/disclosure: My videos/articles are for informational and educational purposes only, you should consult with a professional before attempting anything seen or done in my videos/articles. Please read full disclaimer here: https://basiclowdown.com/disclaimer-disclosure-page/