
In this tutorial I discuss some Excel tips and tricks on how to draw a floor plan. This is a fun project and the advantage of using excel for this is that Excel makes it easy to draw your floor plan to scale. You could use this floor plan to design a garden, position a house on a plot of land, lay out a room in a house like a kitchen for instance. The following Excel tips and tricks are discussed:-
1. Set your zoom slider (bottom right of screen) at the halfway mark, that is 100% or 1:1 ratio. This allows you to adjust the scale of the floor plan both ways. Click and drag slider left to reduce the size or right to enlarge.

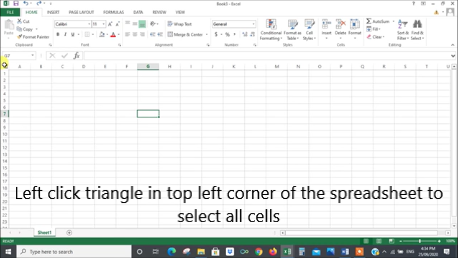
2. At the top left of the spreadsheet (where the columns and rows meet) is a small triangle. Left click on this to select all the cells in the spreadsheet.
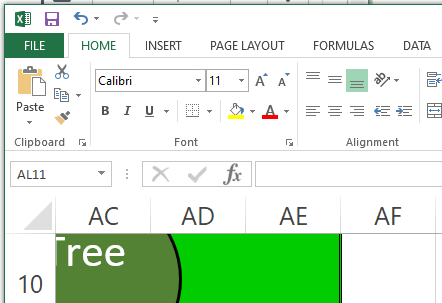
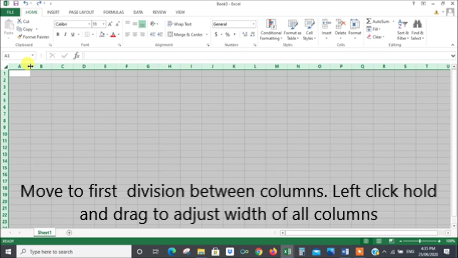
3. Move right along the letters at the top of the columns until the division between columns A and B. A double arrow will appear. Left click, hold down and drag left or right to change the width of all the cells. Use the value for pixels in brackets above the curser to record the width. In this case we used 40 pixels. Let go the left mouse button.
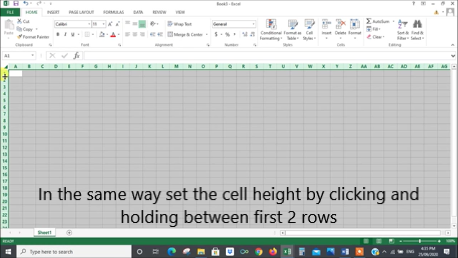
4. Now move to the division between rows 1 and 2. When the double arrow appears left click and drag up or down to adjust the height of all the cells. Set the pixel value as the same as the column width, in this case 40 pixels. Then Let go the left mouse button. Now all the cells in the spread sheet will be squares of the same size.
5. Go back to the zoom slider at the bottom left of screen. Move left or right until all the squares are of a suitable size for your particular floor plan. Record the % of the slider on the floor plan so you can recreate it exactly. Decide on a value for each square metres, feet, centimetres or any value you like and record that next to the % value of the slider.
Select an area for the outline of the floor plan. It is good to leave a clear border all around so that your floor plan border does not get confused with the spreadsheet border.
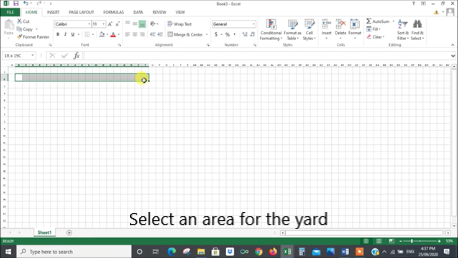
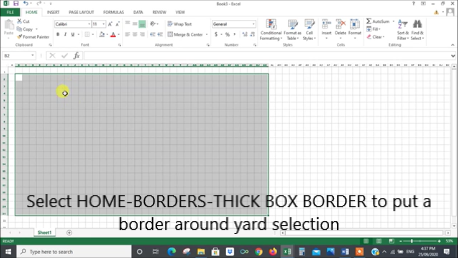
6. Under the HOME Icon at the top of the Excel screen select BORDERS then THICK BOX BORDER to put a border all around your selected area.
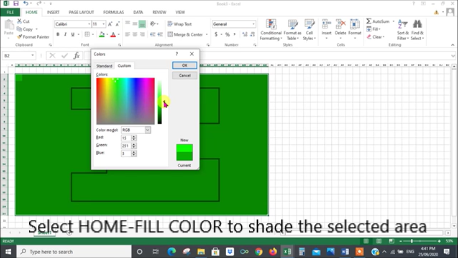
7. Give your selected area a background colour by selecting HOME then COLOR FILL and choose a colour.
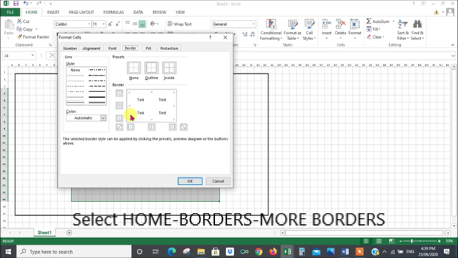
8. To place elements in your floor plan just select an area. Select HOME then BORDERS then MORE BORDERS. Here you can select the type of border and which sides of the selection should be bordered. These elements should be colour filled with a different colour and perhaps labelled with text.
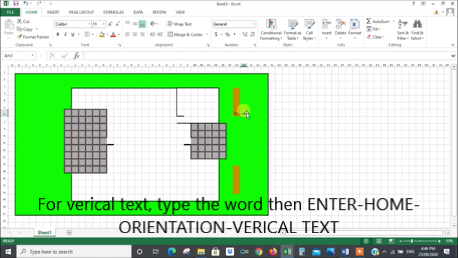
9. To type vertically first select the area and type the word (it will appear horizontally). Then select HOME and under ALIGNMENT select ab with the slanting arrow then select Vertical Text. Then select MERGE&CENTER.
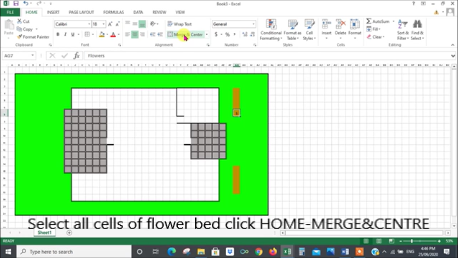
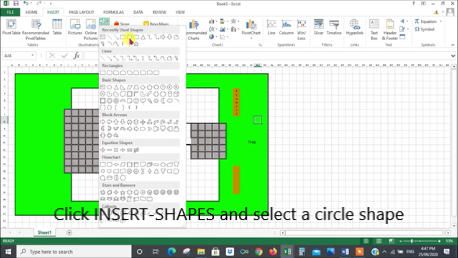
10. To add a shape for a particular element on your floor plan. Under the INSERT icon select SHAPES and select a particular shape then click on the floor plan where you want the shape to be. You can click and drag the shape around and resize or colour it.
The video for this topic can be viewed on the youTube video:
If you require some basic instruction on how to get started with Excel; this video is a good place to start:
Short Disclaimer/disclosure: My videos/articles are for informational and educational purposes only, you should consult with a professional before attempting anything seen or done in my videos/articles. Please read full disclaimer here: https://basiclowdown.com/disclaimer-disclosure-page/