How to make a table from scrap wood
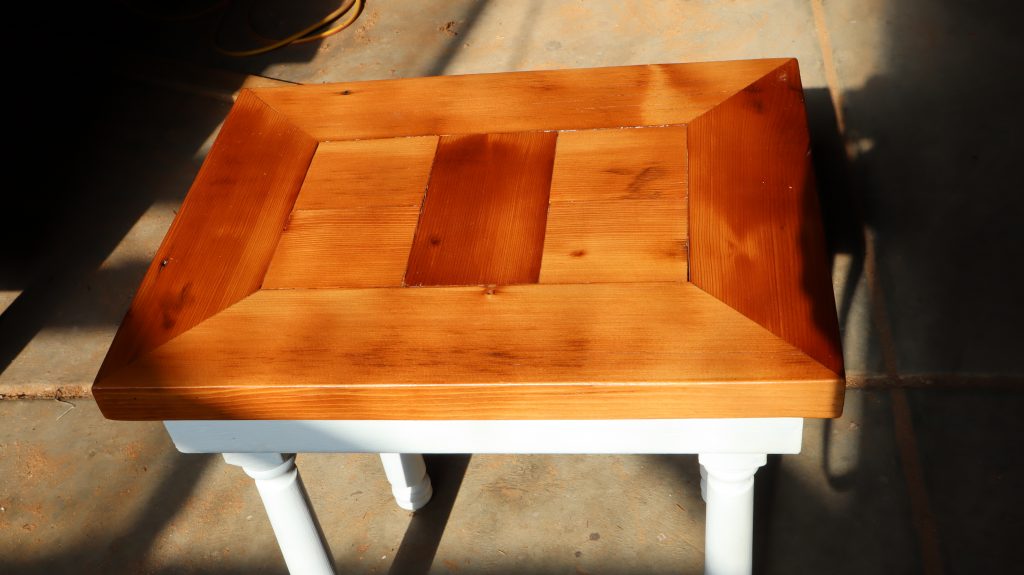
I made this table from scrap wood that I just had lying around. I wanted a rustic out door side table but large enough to cater for 2 people to share for coffee or drinks. It turned out so well that I thought I would share how I made it and pass on a few tricks I used to keep everything square and because it may be used on an uneven surface I have devised a way to stop it from rocking. I will show you that trick at the end of this video.
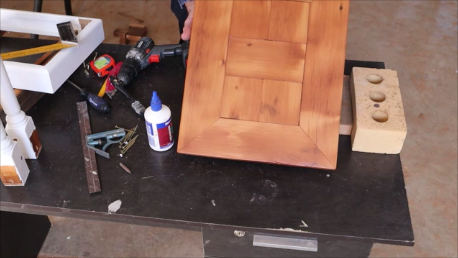
I started by making the top from these old, rough sawn Oregon pine planks. Once you sand or plane away the rough outer layer Oregon pine has a beautiful colour and an attractive fairly fine grain. It did not take much sanding to get it from that to this. It is surprising how easy it is to reclaim or recycle old scrap timber and make some very attractive furniture from that old scrap wood.
Step 1. Decide on your dimensions and choose the best surface for the top and mark it. Then cut 4 pieces at 45 degrees ( so that no end grain is exposed), the long edge being the outside and corresponding to you dimensions. I use this sliding compound saw which I can set to cut at 45 degrees. Best to cut lying flat with your chosen side up. But you could do it by hand or with a circular saw. If your table is to be square then all the pieces should be exactly the same size, any variation here will make it impossible to get it square. And obviously if your table is to be rectangular then opposite sides need to be exactly the same length. Check by stacking them 1 on top of the other.
Step 2. Lightly plane the edges to clean them up but be careful not to alter the dimensions drastically, they should still match each other when stacked. You cannot plane the inner edges once they are glued together.
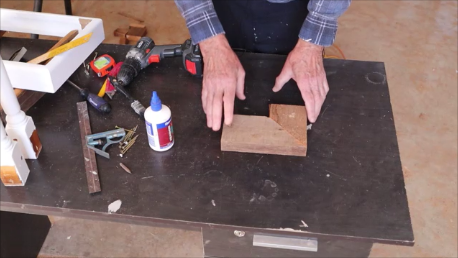
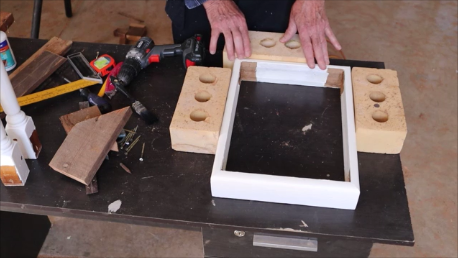
Step 3. Find a perfectly flat surface to work on so that your top ends up perfectly flat. You will also need a reference so that 1 corner can be set perfectly square. I use the corner of this old desk that I have checked for square. Now here is my first tip, instead of clamps I used bricks to hold the shape while the glue is setting. So first check that all your joints are good and that corners are square, adjust by sanding if necessary. I decided not to use fasteners just PVA wood glue and not to use clamps as this often pulls it out of square. The light pressure from the bricks was sufficient to hold everything in place while the glue was setting.
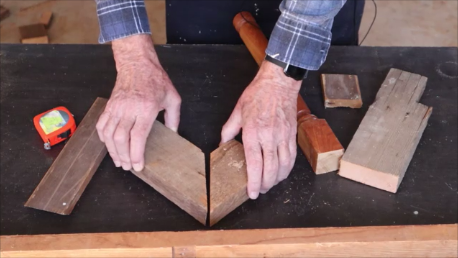
Step 4. Leave 24 hours to set then cut inner blocks so that grain can be used to form a pattern of your choice. Glue them into place on a flat surface. After 24 hours sand upper and lower surfaces clean, flat and smooth. I use this orbital sander which made the job quick and easy and leaves no obvious sanding scratches.
Step 5. While the glue for the top was drying I cut the frame or apron for connecting the legs and top. Here I used some old skirting wood, about 60mm x 20mm. For the legs and apron I was not worried that they did not match the top in grain and colour because I had decided to paint them. They were also measured and cut at 45 degrees but this time I cut them in the vertical orientation as they would be on the finished table. Again checked that opposite sides were exactly the same length and then used bricks again to hold them together. The bricks also helped to make sure that they were not only perfectly square but also perfectly vertical to may flat surface. This is important for the legs to come off the table top perfectly vertical and not at a drunken angle.
Step 6. Glue apron and leave 24 hours to set.
Step 7. Sand apron
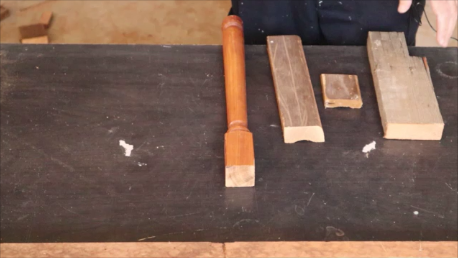
Step 8. Cut 4 legs exactly the same length which can be any shape but must have square corners at the top for at least the width of the apron. I happened to have these turned legs lying around.
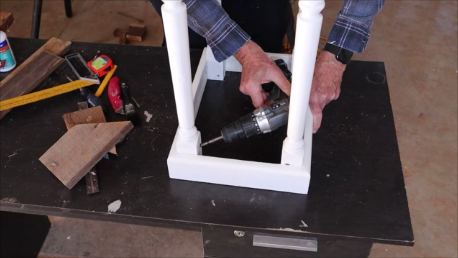
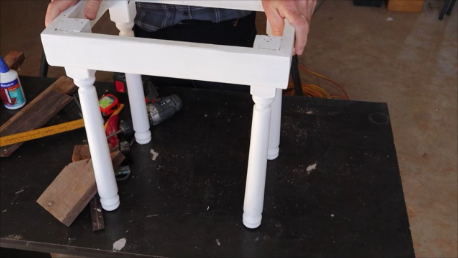
Step 9. Place Apron on flat surface and position and screw legs both ways across the corner of the apron. That will help to strengthen the joints at the corners of the apron. Because the apron was set up vertical to the flat surface the legs should come off the apron vertically.
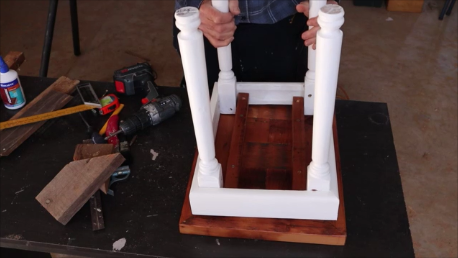
Step 10. Centralise legs and apron on the underside of the top, and mark its position and orientation.
Step 11. Cut 2 stout pieces of wood about 35mm x 45mm to fit loosely between legs in the long direction and extend from the inside of the apron to the inside of the other side. This will be screwed on the top and at an angle into the tops of the legs and will help orientate the top and secure it to the legs and apron.
Step 12. Paint legs and use clear polyurethane varnish on the top for a durable finish.
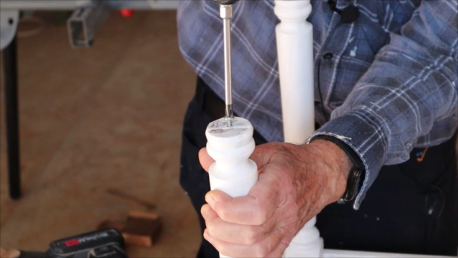
Step 13. Now my final tip is a way to stop your table rocking on an uneven surface. Find your shortest leg ( and there always will be 1 no matter how careful you are) and sink a pilot hole about 2.5mm and screw in a screw with a low profile rounded head. Adjust by screwing it in or out until rocking stops.
Here is a video demonstration of the scrap wood table construction
Comments are most welcome, try this and send us some feedback☺️ Why not visit our channel and browse through our other videos? http://www.youtube.com/c/AnnErasmus
Here are more DIY videos that may be of interest
Short Disclaimer/disclosure: My videos/articles are for informational and educational purposes only, you should consult with a professional before attempting anything seen or done in my videos/articles. Please read full disclaimer here: https://basiclowdown.com/disclaimer-disclosure-page/